How to Add Logo Patches to Team Apparel
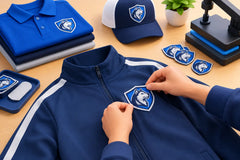
A sharp logo patch can make a warmup jacket, coach polo, team hoodie, or travel bag look like it belongs to a real program - not a last-minute collection of gear. Knowing how to add logo patches correctly matters because the wrong backing, placement, or application method can leave a premium-looking garment puckered, peeling, or damaged after a few washes.
For clubs, schools, and recreational teams, the best approach depends on the garment fabric, how hard it will be used, and whether you need a few pieces or a full team order. Start with the patch and apparel working together, not as two separate decisions.
Choose the Right Patch for the Job
Most team apparel patches fall into three categories: embroidered patches, woven patches, and printed patches. Each has a different look and a different best use.
Embroidered patches are the classic choice for bold club logos, mascots, and simple lettering. The raised thread gives jackets, polos, and sideline gear a traditional athletic finish. They are durable, but fine lines and small details can get lost in the stitching. If your logo has tiny type, gradients, or detailed artwork, embroidery may not be the best match.
Woven patches use finer threads, so they can reproduce small lettering and detailed badge designs more clearly. They have a flatter finish than embroidery, which works well for soccer crests, school seals, and sponsor marks. Printed patches are best when color accuracy is the priority. They can handle gradients, photo-style art, and complex designs, though the final feel depends on the print and backing selected.
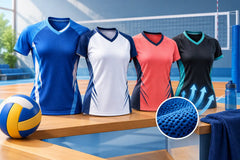
For game jerseys, especially sublimated uniforms, consider whether a patch is necessary at all. A logo built directly into the sublimation design will not peel, crack, or add bulk. Patches are often a stronger fit for tracksuits, coach apparel, hoodies, polos, equipment bags, and supporter gear. The goal is a unified team identity without compromising performance on the field or court.
How to Add Logo Patches: Pick an Attachment Method
The attachment method is what determines whether a patch looks clean after one season or stays sharp for years. Heat-seal, sew-on, and hook-and-loop backings each have a place in teamwear.
Heat-seal patches for fast team orders
Heat-seal patches use an adhesive backing activated by heat and pressure. They are a practical option when you need a clean, low-profile finish and fast application across many garments. A quality heat press provides more consistent results than a household iron because it holds steady temperature and distributes pressure evenly.
Before pressing, check the garment label and the patch supplier's instructions. Polyester performance apparel is sensitive to excessive heat. Too much temperature can scorch fabric, create shine marks, or cause dyes to migrate. Use a protective cover sheet, test one garment first, and let the patch cool fully before checking adhesion.
Heat-seal works especially well on smooth, stable fabrics. It is less reliable on heavily textured fleece, very stretchy fabrics, waterproof shells, and garments with seams or thick pockets directly under the patch location.
Sew-on patches for maximum durability
Sewing is the most dependable method for garments that will be washed constantly or used hard throughout the year. A stitched border gives the patch a finished, professional appearance and provides mechanical strength that adhesives alone cannot match.
For team jackets, polos, hoodies, and travel gear, a sewing machine usually produces the most consistent result. Match the thread color to the patch edge when you want a subtle finish, or use a team color to make the border part of the design. Keep the stitching close to the patch edge, and avoid pulling the garment fabric while sewing. Stretching during application can create ripples once the garment relaxes.
Sew-on patches take more labor than heat-seal patches, so they may not be the fastest solution for a large deadline-driven order. Still, if durability is the priority, the extra step is worth it.
Hook-and-loop patches for interchangeable gear
Hook-and-loop patches are ideal when names, ranks, sponsors, or event identifiers need to change. They are common on coach bags, staff jackets, training tops, and tactical-style team gear. Sew the loop side securely to the garment, then attach the patch as needed.
This option adds flexibility, but it also adds bulk. It is not the cleanest choice for lightweight performance jerseys or fitted polos. Use it where function matters more than a flat finish.
Plan the Placement Before You Attach Anything
A great patch in the wrong spot still looks off. Placement should be consistent across the team, easy to see, and practical for the garment's construction.
The left chest is the standard location for a club crest or school logo on polos, hoodies, jackets, and off-field apparel. It feels familiar and leaves room for names, sponsor marks, or numbers elsewhere. On full-zip jackets, position the patch on the wearer's left side and keep it clear of the zipper so the garment can open and close without pulling the patch.
Sleeves work well for league badges, tournament patches, flags, or sponsors. Keep them a few inches below the shoulder seam and use the same placement on every garment. A patch too close to a seam can wrinkle, while one too low may disappear when sleeves roll or bunch.
For bags, consider how the item will be carried. A front-panel patch is highly visible, but avoid areas that fold, curve sharply, or rub against the ground. For hoodies and warmups, check pockets, drawstrings, and zipper paths before marking the location.
Use a measuring tape, tailor's chalk, or removable placement dots. Lay several garments side by side before attaching the first patch. This simple quality-control step prevents a batch of logos from sitting at slightly different heights.
Match the Patch to the Fabric
Fabric is where many patch projects go wrong. Cotton tees, polyester jerseys, fleece hoodies, nylon shells, and stretch performance fabrics react differently to heat, thread tension, and adhesive.
Polyester is common in sportswear because it is lightweight, durable, and moisture-wicking. It can also be heat-sensitive. If you are applying a heat-seal patch to polyester, use the lowest effective temperature and a short dwell time based on the patch instructions. Always test an inside hem or spare garment first.
Fleece and heavy hoodies can be sewn easily, but the textured surface may reduce heat-seal contact. Nylon windbreakers and water-resistant jackets require extra care because high heat can damage the coating. In many cases, sewing is the safer choice. Stretch jerseys can pucker if a patch is too stiff or if the stitching is too tight, so select a lightweight patch and avoid placing it in high-stretch areas.
This is also why ordering custom apparel and patches as one coordinated project can save time. The patch size, backing, fabric, logo colors, and garment construction should support the same finished look.
Get the Logo Artwork Ready
Your patch will only look as clean as the artwork behind it. Send the best logo file available, ideally vector artwork such as AI, EPS, PDF, or SVG. These files can scale without losing sharpness. A high-resolution PNG may also work, but a blurry screenshot or social media image can limit detail and color accuracy.
Keep small text realistic. If a crest includes a long tagline around a narrow border, it may need to be simplified for embroidery. Ask for a mockup before production so you can review thread colors, border shape, text legibility, and final patch size. A patch that looks good on a computer screen may be too small to read once it is stitched.
RRR Sports America can help teams coordinate custom logos, colors, and embroidered patch details across uniforms and sideline apparel, so the finished collection looks planned from game day through travel day.
Avoid the Mistakes That Cost Teams Time
Do not attach patches without testing the process on one sample garment. Check the patch after it cools, then wash the sample if the apparel will see frequent laundering. If an edge lifts, adjust the heat, pressure, time, or switch to sewing before completing the full order.
Avoid oversized patches on lightweight shirts, and do not press over zippers, seams, pockets, or thick embroidery. Keep an eye on logo orientation too. It sounds obvious, but reversed patches and uneven chest placement are among the most frustrating preventable errors in team orders.
For a polished result, treat patches as part of the uniform design from the start. Choose the right patch type, confirm placement with a mockup, and use an attachment method built for the fabric and the season ahead. Your players will notice the difference every time they zip up, line up, and represent the team.